Advanced CNC Cutting Board Project
Hello, CNC enthusiasts and aspiring woodcrafters! Are you ready to roll up your sleeves and dive into the world of CNC woodworking? Today, we're embarking on a journey perfect for beginners – creating a sleek and functional cutting board using a CNC machine. This project isn't just about cutting and carving; it's about blending the precision of modern technology with the timeless art of woodworking. And what better way to start than with a project that's as practical as it is charming?
Today, we're drawing inspiration from a fantastic video by ToolsToday. This guide isn't just a step-by-step walkthrough; it's a treasure trove of tips, tricks, and CNC secrets that will transform a simple piece of cherry wood into a kitchen masterpiece. Whether you're a seasoned pro or just starting, there's something in this project for everyone. So, let's gear up, get our bits in order, and start this exciting journey into the world of CNC woodworking!
Getting Started: The Basics
We're exploring the basics of creating a cutting board with a CNC machine, inspired by the skilled team at ToolsToday. But let's broaden our view a bit and talk about the general essentials you'll need for such a project, regardless of the specific tools and bits.
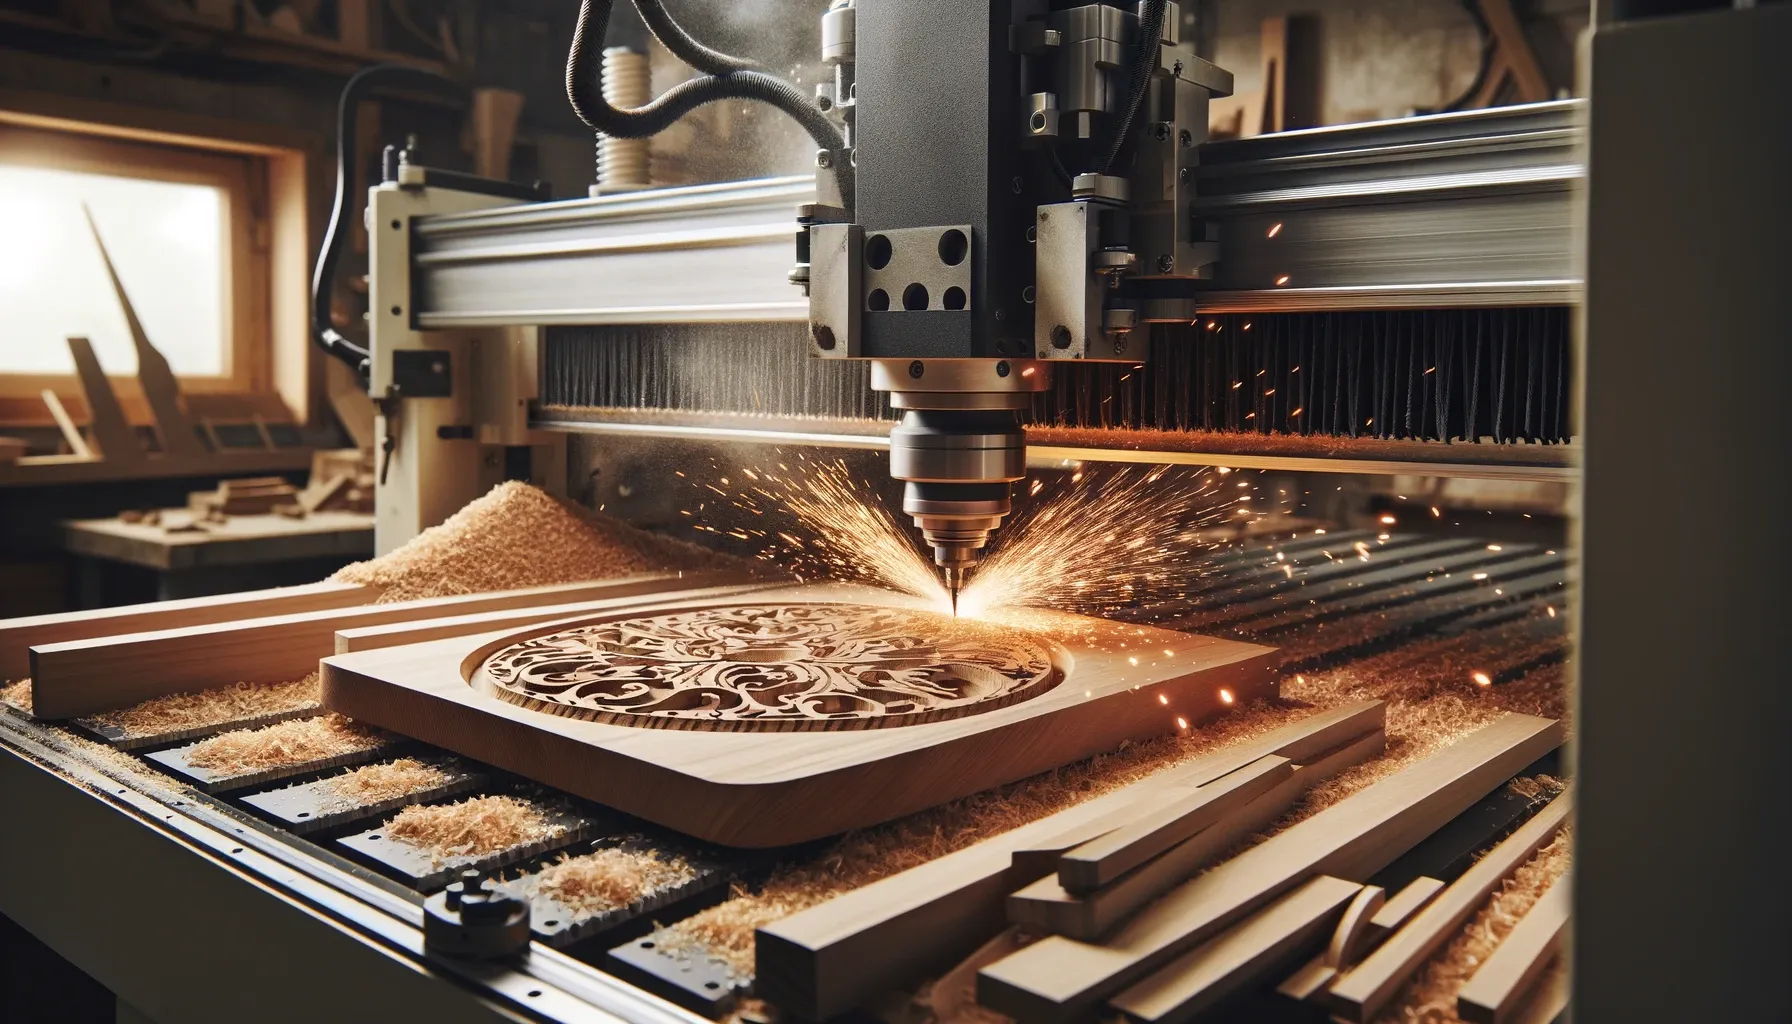
First up, the material: cherry wood is a fantastic choice for beginners. It's forgiving, easy to carve, and has a natural beauty that shines through with a bit of work. However, feel free to experiment with other woods like maple or walnut. Each type of wood has its own character and will add a unique touch to your project.
Now, onto the machinery. While the video features a specific model, the key is to have a reliable CNC machine that suits your workspace and budget. The size and power of the machine you choose will depend on the scale of your projects and the level of detail you want to achieve.
As for the bits, think of them as the business end of your CNC machine. You'll need a variety of bits for different purposes: flattening bits to create a smooth, level surface, V-bits for detailed engraving, and perhaps some specialty bits for unique effects like textures or intricate patterns. The choice of bits will greatly influence the final look and feel of your cutting board.
Step-by-step Guide
Creating a cutting board with a CNC machine can be a fun and rewarding project for beginners. Here's a simplified guide to help you get started:
1. Prepare Your Wood
- Choose Your Wood: Start with a piece of cherry wood, known for its beauty and ease of use.
- Secure the Wood: Make sure the wood is firmly attached to your CNC machine. You can use clamps or a vacuum table if your machine has one.
2. Flatten the Surface
- Use a Flattening Bit: Install a flattening bit on your CNC machine. This will help create a smooth, even surface on the wood.
- Run the CNC: Let the machine pass over the wood, flattening the entire surface.
3. Engrave a Design (Optional)
- Choose a Design: If you want to add some personality to your board, pick a simple design or text to engrave.
- Use a V-Bit: Install a V-bit for engraving. This bit is great for detailed work.
- Run the CNC: Carefully engrave your design onto the wood.
4. Fill with Epoxy (Optional)
- Mix Epoxy: If you engraved a design, you can fill it with epoxy for a nice contrast. Mix the epoxy according to the instructions.
- Apply Epoxy: Pour the epoxy into the engraved areas and let it dry.
5. Re-flatten the Surface
- After Epoxy: If you used epoxy, once it's dry, run the flattening bit over the surface again to level the epoxy with the wood.
6. Sanding
- Sand the Wood: After the CNC work, sand the board to make it smooth. Start with a rougher grit and move to a finer grit.
7. Add Functional Features
- Juice Groove: You can use a core box bit to carve a groove around the edge for catching liquids.
- Chamfers or Edges: Add chamfers (angled edges) for a nice finish. You can use a chamfer bit for this.
8. Final Touches
- More Sanding: Do a final sanding to ensure everything is smooth.
- Oil the Board: Apply a food-safe oil to protect the wood and bring out its natural beauty.
9. Enjoy Your Creation
- Admire Your Work: You now have a beautiful, handmade cutting board!
Remember, this is a basic guide. Feel free to add your own creative touches. The beauty of CNC work is in the customization and personalization you can bring to each project. Have fun and enjoy the process! 🌟🛠️
Pro Tips:
- Bit Selection: Choose the right bit for each task. V-bits are great for detailed work, while flattening bits are essential for even surfaces.
- Epoxy Work: Be patient and precise with epoxy. It can add a fantastic look but requires careful handling.
- Grain Popping: This technique, shown in the video, is a game-changer. It preps the wood for a final finish, reducing manual labor.
Conclusion
Creating a cutting board on a CNC machine is a rewarding project that combines precision technology with traditional woodworking. The video by ToolsToday is a comprehensive guide, but remember, every project is an opportunity to add your personal touch. Experiment with different designs, bits, and finishes. Happy CNC crafting!